“Are they real? Oh my goodness, they are so lifelike! Are they going to jump out at me? How are they made?”
These are just a few of the questions and comments from visitors about the incredibly realistic figures at the Fort Pitt Museum.
For the new exhibit, set to open on May 22, Captured by Indians: Warfare and Assimilation on the 18th Century Frontier, the Fort Pitt Museum will create five new museum figures, including Massy Harbison.
Before the lifecasting process begins, museum staff members first conduct research on the subject. This research goes into planning the figure’s final display: in what setting, with what props, in what position, etc. Finally, the museum solicits the aid of a volunteer or staff member who is well suited to depict the individual and is willing to have his or her head, feet, or hands cast.
For the Massy Harbison figure, the wonderful and patient Randi Stewart volunteered her time—and head—to the museum.
And now the casting process begins!
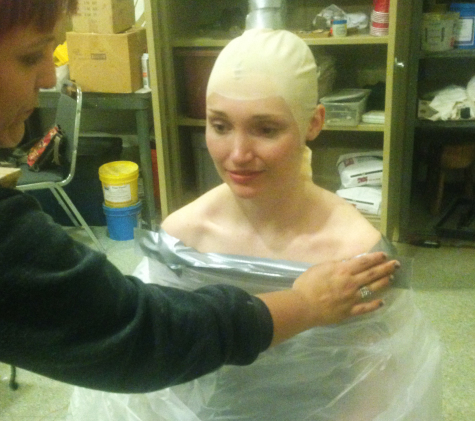
Museum staff members utilize techniques mastered by model maker Gerry Embleton, the Anglo-Swiss artist known for creating the figures of the popular Clash of Empires exhibition at the Heinz History Center.
First, a bald cap is placed on Randi’s head and attached with Spirit Gum, an alcohol-based liquid resin adhesive often used in the theater and movie industries. Since she has long hair, museum staff members pull the excess hair up through a slit in the top of the cap and wrap it in plastic wrap. It is very important to put Vaseline on all hair that is exposed—eyebrows and eyelashes included!—so as not to lose said hair.
Next, museum staff members use plastic cups to prepare separate portions of alginate and water. These two materials will form the mold. Alginate is a seaweed-based powder that, when mixed with cold water, forms a gum. This gum can be placed on a material—or, in this case, Randi’s head. When set, it picks up even the smallest pores and fine details. If you have ever had impressions of your teeth taken at the dentist, you’ve experienced alginate.
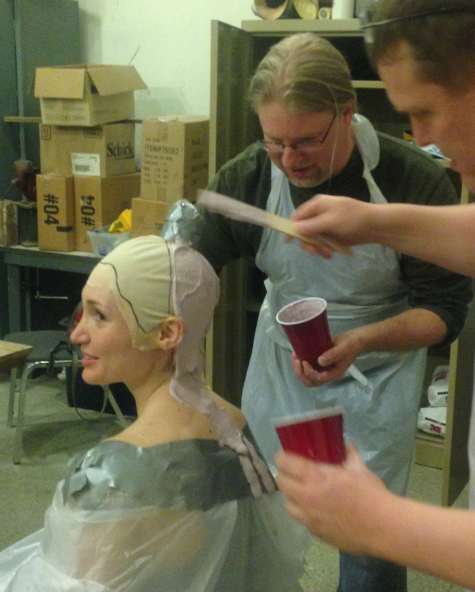
Once Randi is in position, museum staff members mix a portion cup of alginate into a portion cup of water and begin smoothing the mixture over the back of her head. As it hardens, it will help keep her in position for the rest of the casting.
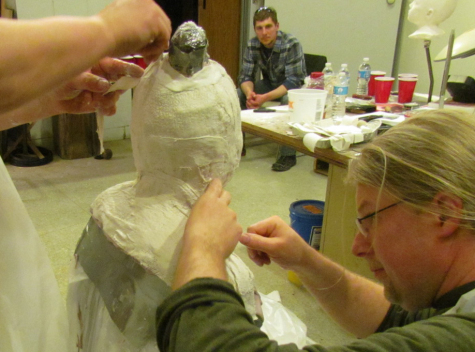
Once the alginate has set, museum staff members use plaster bandages—like the ones used to create a cast for a broken bone— and cut them into strips, dip them in water, and place them on top of the alginate. These add extra reinforcement to the alginate, which is still flexible even after setting.
With the plaster bandages all set, half of the mold is complete! Vaseline comes into play again, and museum staff members spread it along the edge of the mold that covers the back of her head. Vaseline will act like a barrier, forming a seam between the front and back halves. This is crucial, as it will allow Randi to be released easily when the mold is fully set.
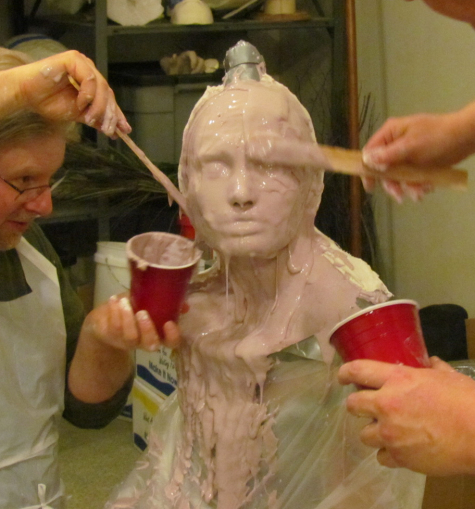
Museum staff members mix another batch of alginate into water. This mixture is more fluid so that it will capture all the details of her face and expression. Everything except the nostrils will be covered! After the alginate sets, museum staff members apply more plaster bandages to the front of her face, creating a rigid shell.
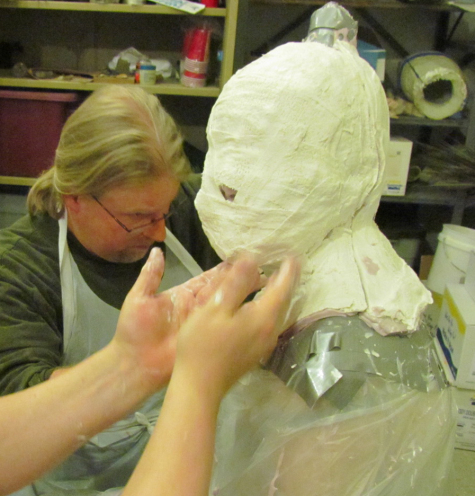
The plaster and alginate are set! At this time, Randi can start to move her face to loosen it away from the mold. Due to lack of detail on the back half, the back usually comes off easier than the front.
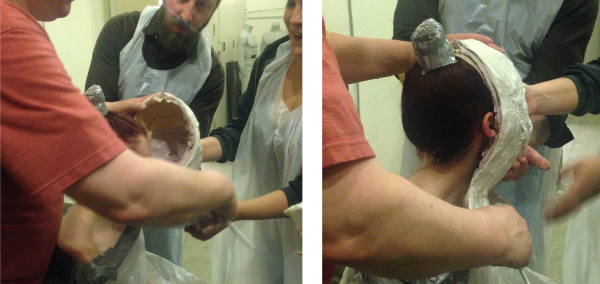
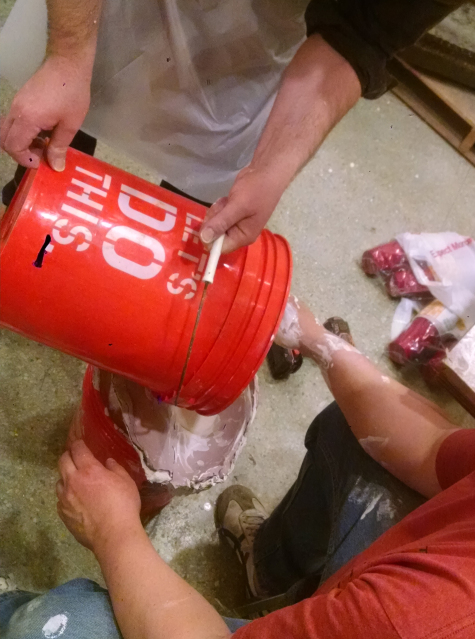
Museum staff members immediately put both halves of the mold back together and seal it with more plaster bandages. Then, museum staff members place the mold securely in a receptacle to await a plaster of Paris filling. Once the plaster of Paris sets, the outer shell can be popped off and discarded within 24 hours.
A few modifications are made to add skin texture and details with the help of reference pictures. Museum staff members sculpt the eyes and other facial features that make the figure appear so lifelike!
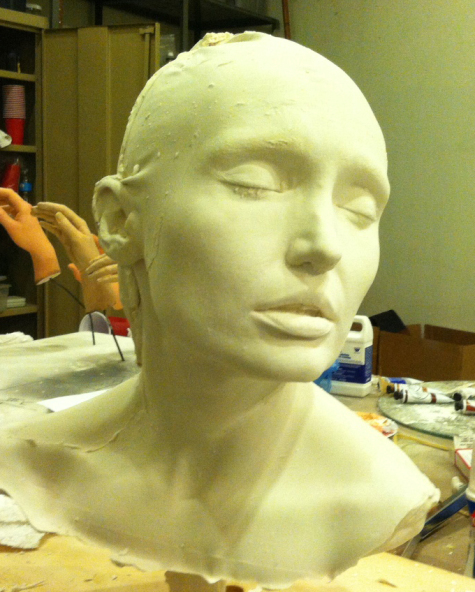
Museum staff members then make a silicone based mold of the original plaster head and cast it again using a lightweight plastic. The staff members use a slightly simpler technique to make molds of Randi’s hands and feet. They paint these limbs and attach them to the mannequin body, which will be clothed and posed to be Massy Harbison in the Captured by Indians exhibit.
To learn more about Harbison and her unique story of captivity, read an excerpt taken from her story here.
Megan Shalonis is the lead customer service associate at the Fort Pitt Museum.