In this blog series, we have primarily concentrated on the most common uniform coat worn by a Royal American on the 18th century frontier but a few other variations existed. The sergeants of the regiment had a coat, waistcoat, and breeches made out of a mock scarlet cloth (a more vibrant red) with blue shallon for linings. Purchases appear for this same type of cloth to make uniforms for the musicians of the first battalion as well.
Men of the grenadier company had extra cloth around the top of the arms called “wings,” while men of the light infantry company had the same “wings” with the tails and skirts cut shorter. Fifers and drummers of the regiment had Royal Livery lace applied to their uniforms along with wings and false sleeves.
Let’s continue with our overview of how to construct your own Royal American coat.
Materials for the coat were purchased from Roy Najecki of Rhode Island and consist of about 2 1/4 yards of Kochan and Phillips Madder Red Broadcloth, 2 yards of Royal Blue Bay, 1/3 yards of Royal Blue Broadcloth, some linen Buckram, and a natural linen for sleeve linings and pocket bags.

The coat body panels are sewn together beginning with the back panels. The side seam of the front panels with their respective shoulder seams is next.
First, pin the lining out of the way. This pattern calls for ½” seam allowance, which is quite large for original garments so you can remove it if you prefer. Backstitch all seams. Next, attach the sleeves by pinning the bottom sleeve into the armhole, then the top, stretching the top as needed. Again, backstitch it in place beginning with the bottom.

The lining can now be sewn together. One lining edge overlaps the other. Make sure the rear lining piece is always underneath – the two front linings will overlap each rear lining at the side seams. Next, fold the raw edge and whip stitch it down to the rear lining piece. Leave the front edge of the front lining piece by the lapels loose.

Begin attaching the mariners-style cuff treatment with the false button holes in the same way the pocket was attached.
The next step is to attach the collar to the coat and whip stitch the inside lining piece over the bay lining to close the top.
Top stitch on the lapels with the finished buttonholes. Cut open the buttonholes on the non-facing lapel and running stitch it to the front carefully so that it is not easily visible. Stitch the front lining closed with a running stitch.
Continue folding over the raw edge of the lining and close it around all of the tails.
Now, work three buttonholes equally between the bottom of the lapels with the third one ending at the top of the pocket or waistline of the coat.
Cut out a shoulder strap and attach it to the shoulder.
Press the pleats into the rear of the coat using the tailors tacks placed at the start. At the Fort Pitt Museum, we use a 12-pound iron along with a pressing cloth and oak board. Stitch them and attach buttons at the rear top vent and bottom corner.

Front panel: bring the bottom line to the top line. The middle line should be where the fold in the cloth is.

Back Panel: bring the bottom line to the top line again, however use the top line as a fold line to press the remaining fabric under, so that the back has two pleats.

Finished pleating should stand and is stitched closed at the top with a back stitch. A button is placed at the top and bottom, corded through the front panel and sewn in the rear panel.
Begin placing buttons. Using an awl, poke through the fabric. On the opposite side, run a piece of cord (linen, hemp, or leather) through the button shanks and stitch the cording down so it does not come loose.
Sleeve linings can be sewn up with a backstitch, pressed, and turned inside out. Place each in their respective arms, fold the edges over, and whip stitch down.

Finished inside of coat.
If you haven’t done so already, begin removing all the basting stitches and try it on.

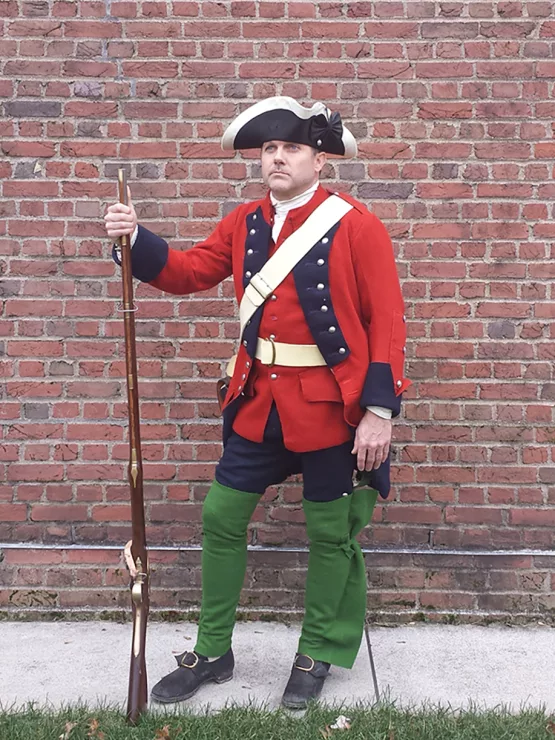
Finished coat on an interpreter of a Royal American in the First Battalion in 1759.
Justin Meinert is the living history program coordinator at the Fort Pitt Museum.